
At Vonage, we use OpenAPI to describe all our APIs, and we also make those specifications publicly available.
One of our favorite things to do with an OpenAPI file we haven’t seen before is to import it into Postman. Therefore, we’ve decided to pay it forward and create a Postman Collection for our APIs so that evaluating and exploring them is quicker and easier than ever.
In this article, we highlight how you can make exploring your APIs in Postman even more approachable. We’ll be using The Vonage APIs Postman Collection as an example, so make sure to go through the prerequisites list if you want to follow along.
Prerequisites
Vonage API Account
To complete this tutorial, you will need a Vonage API account. If you don’t have one already, you can sign up today and start building with free credit. Once you have an account, you can find your API Key and API Secret at the top of the Vonage API Dashboard.
This tutorial also uses a virtual phone number. To purchase one, go to Numbers > Buy Numbers and search for one that meets your needs.
Variables are Your Friends
When you first import the Vonage APIs Collection into Postman, you’ll see a Vonage APIs folder appear under Collections on the left-hand side of your screen.
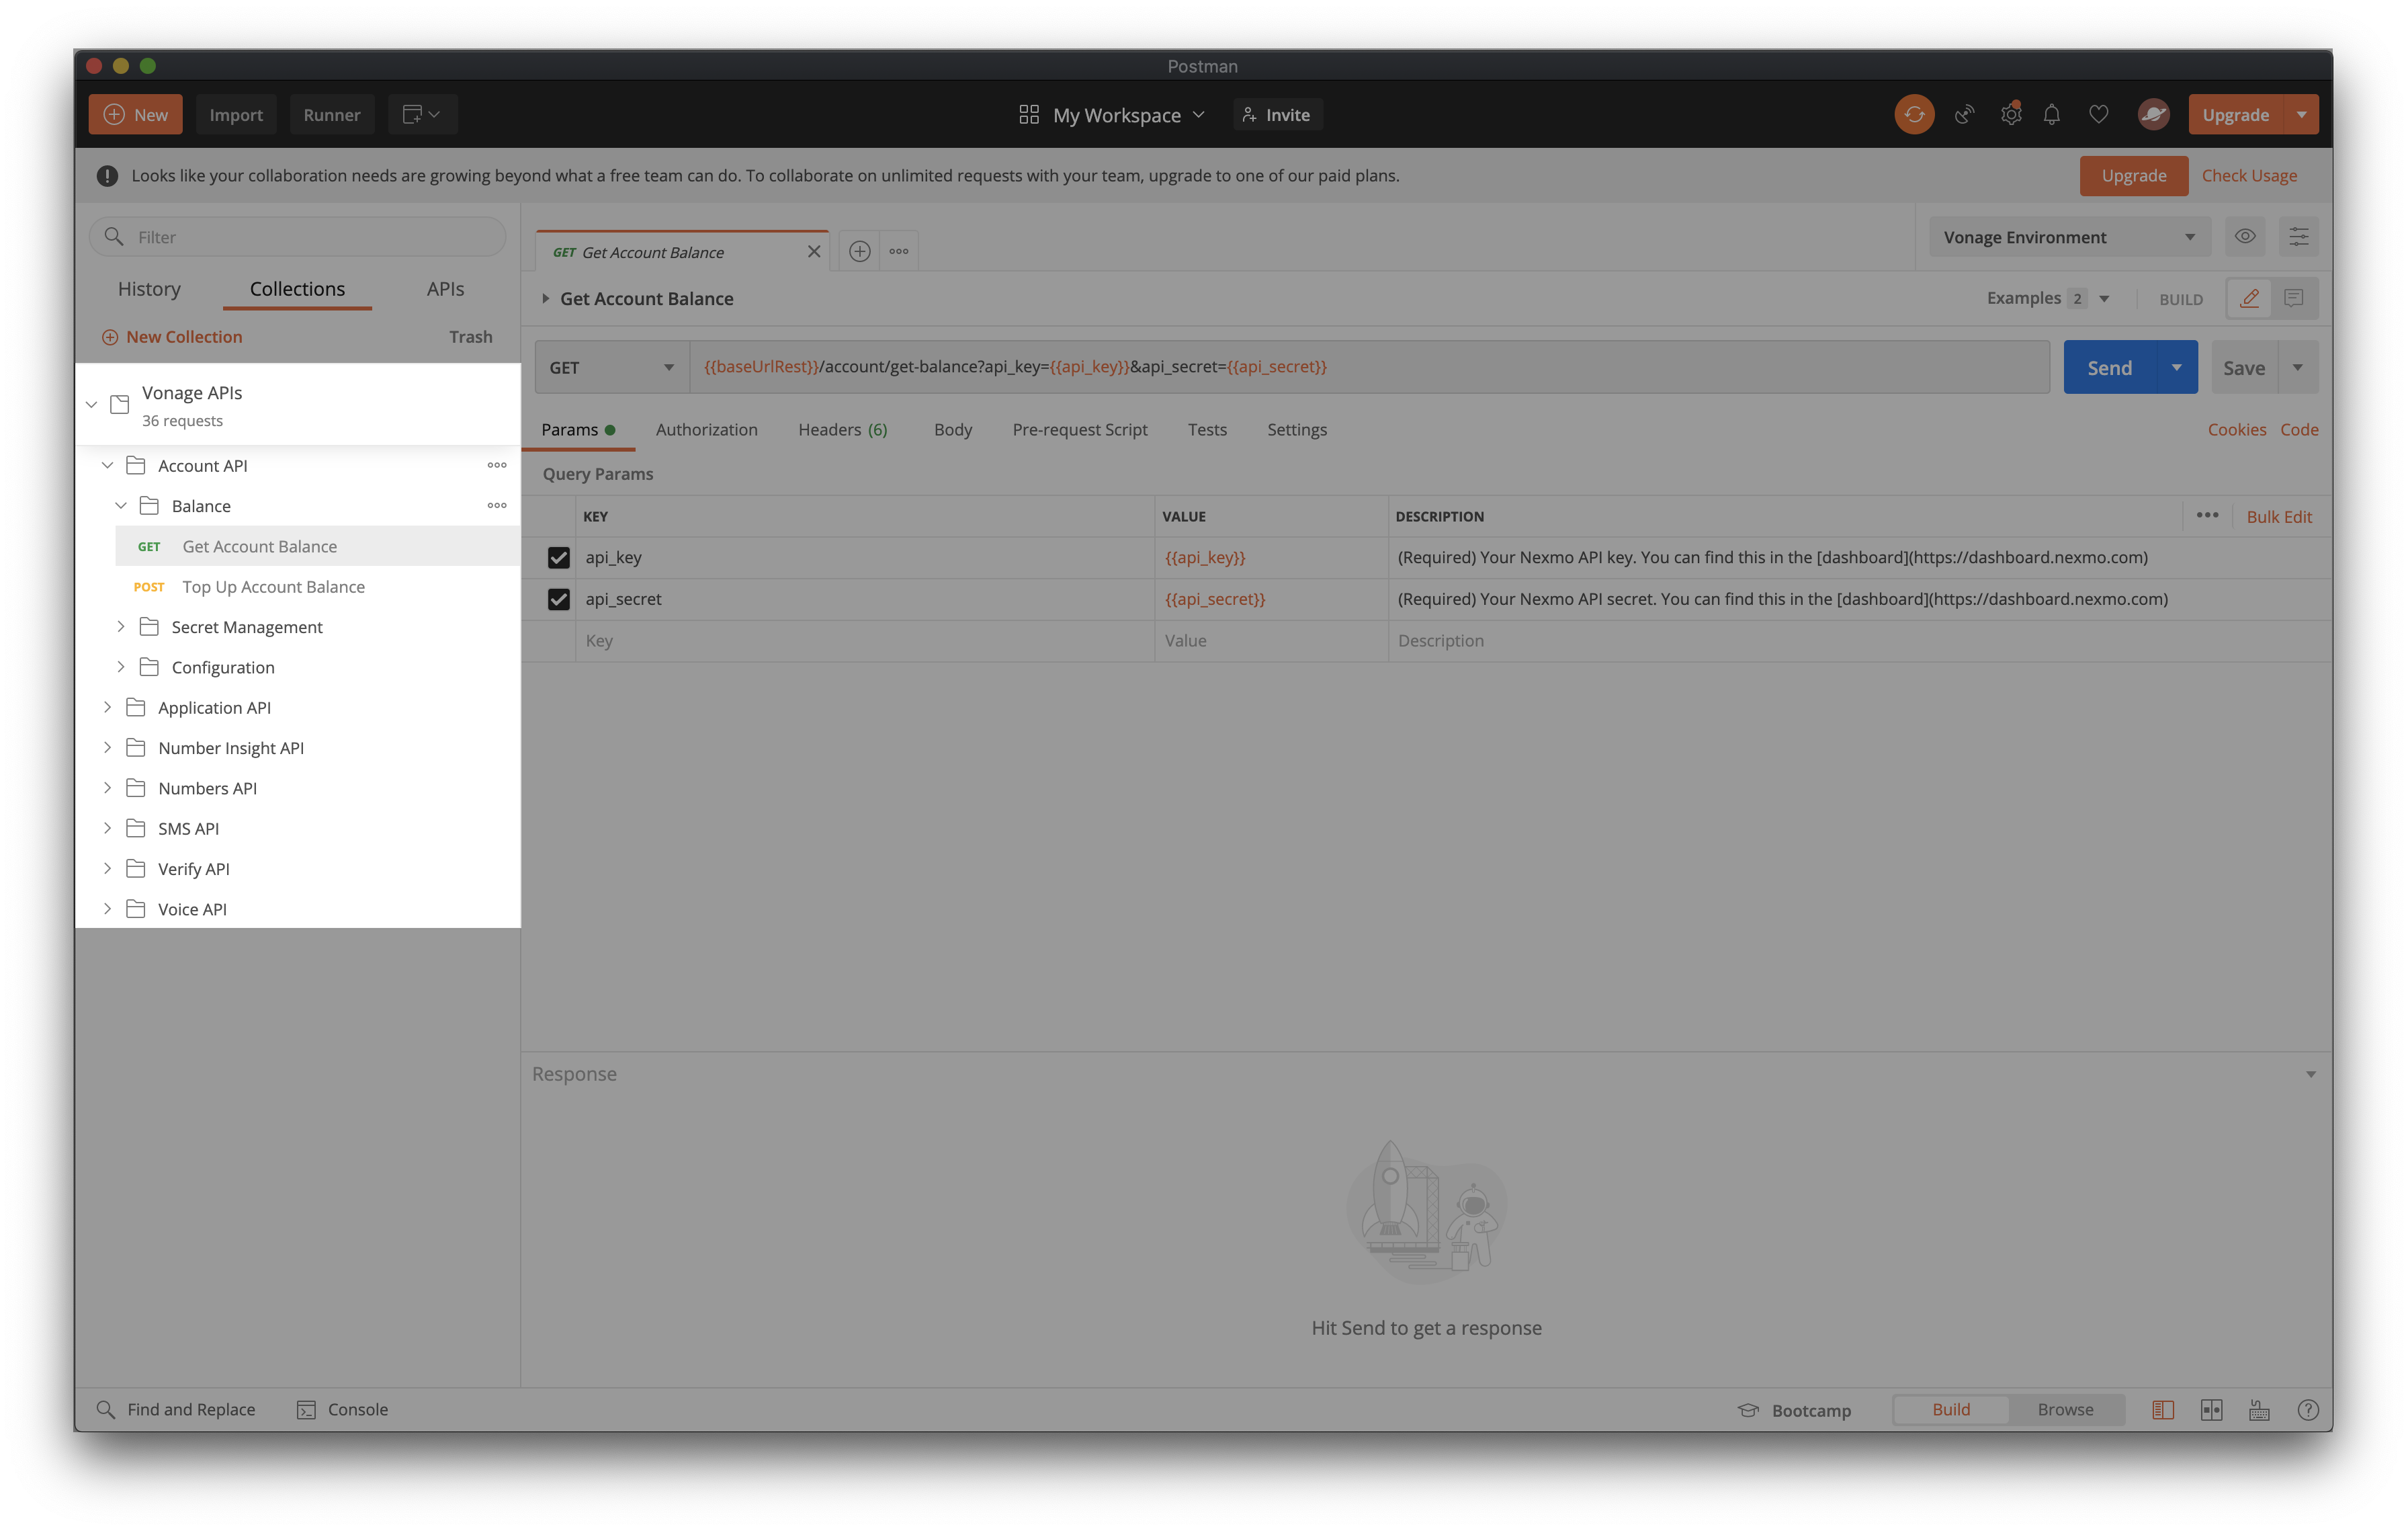
You might also notice the “36 requests” under the collection name. Depending on the auth type, that is more or less 36 times someone would have to add api_key and api_secret as request parameters.
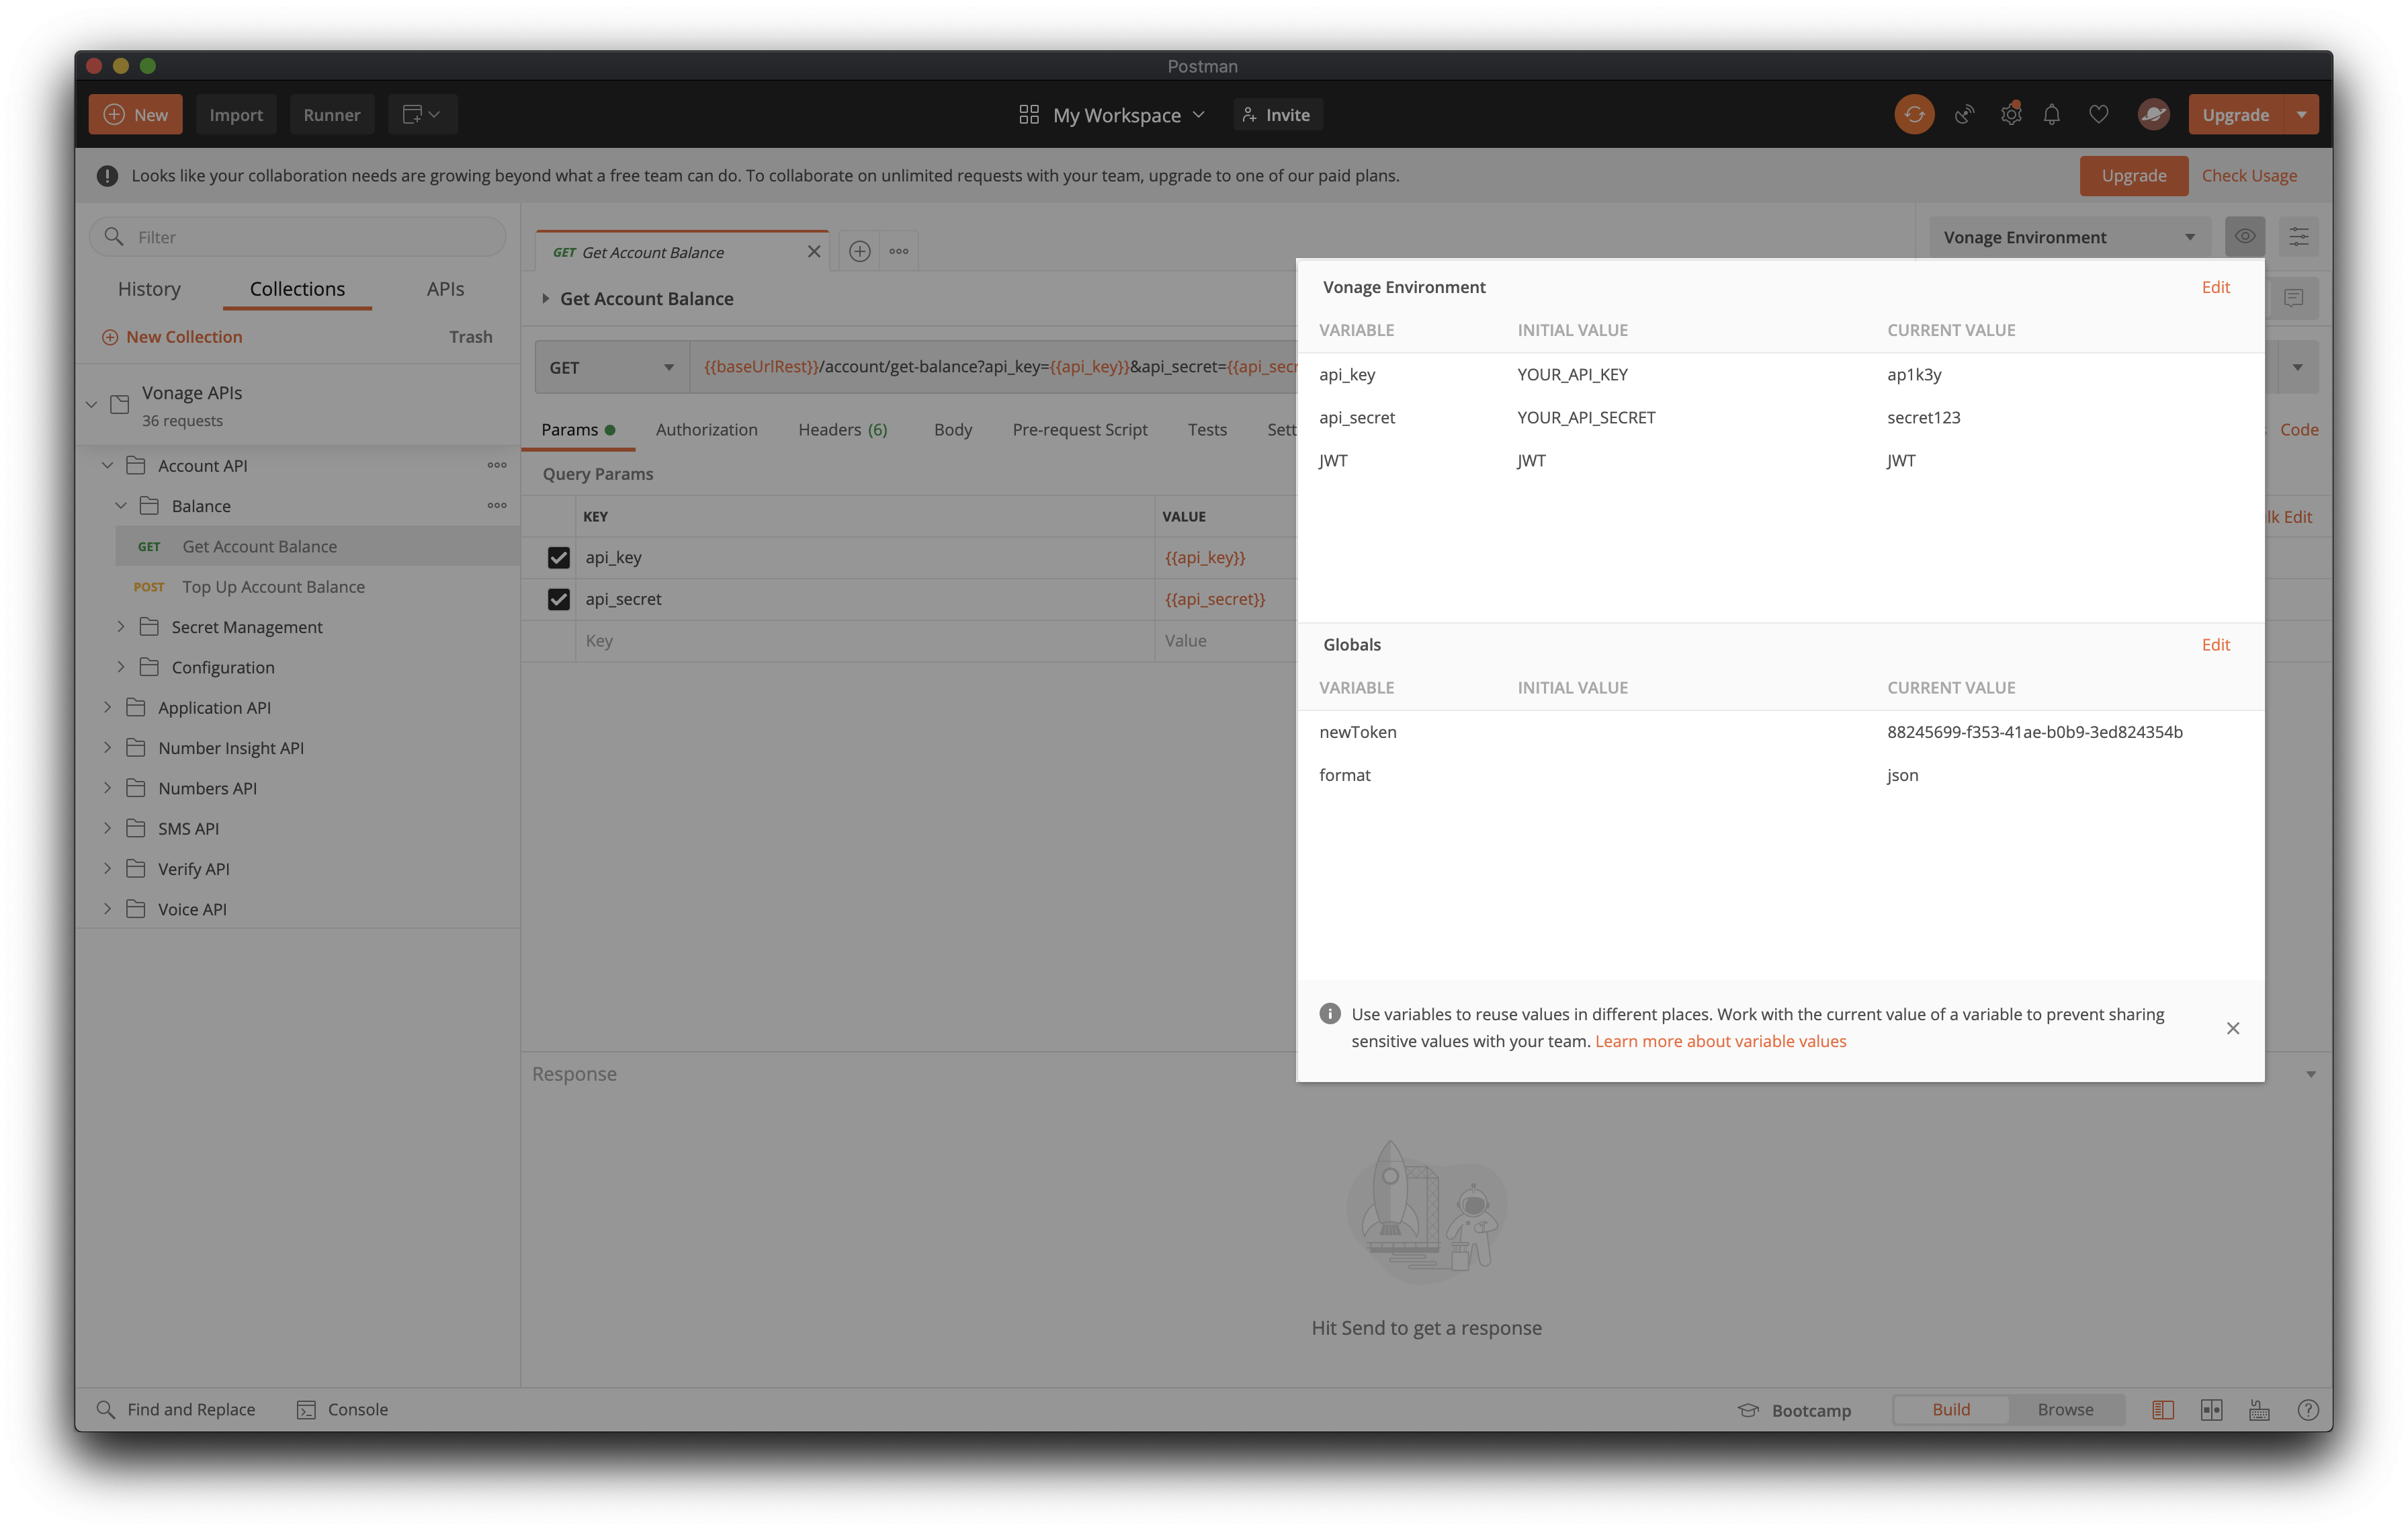
Fortunately, Postman supports environment, global and collection-level variables, which will all make the experience a lot more smooth and less painful. Instead of performing repeated tasks, such as filling in the same parameter values for every request, these variables enable us to pull those values in dynamically.
Our collection comes with a Vonage Environment where you can provide your key and secret, and then all requests will use those values moving forward.
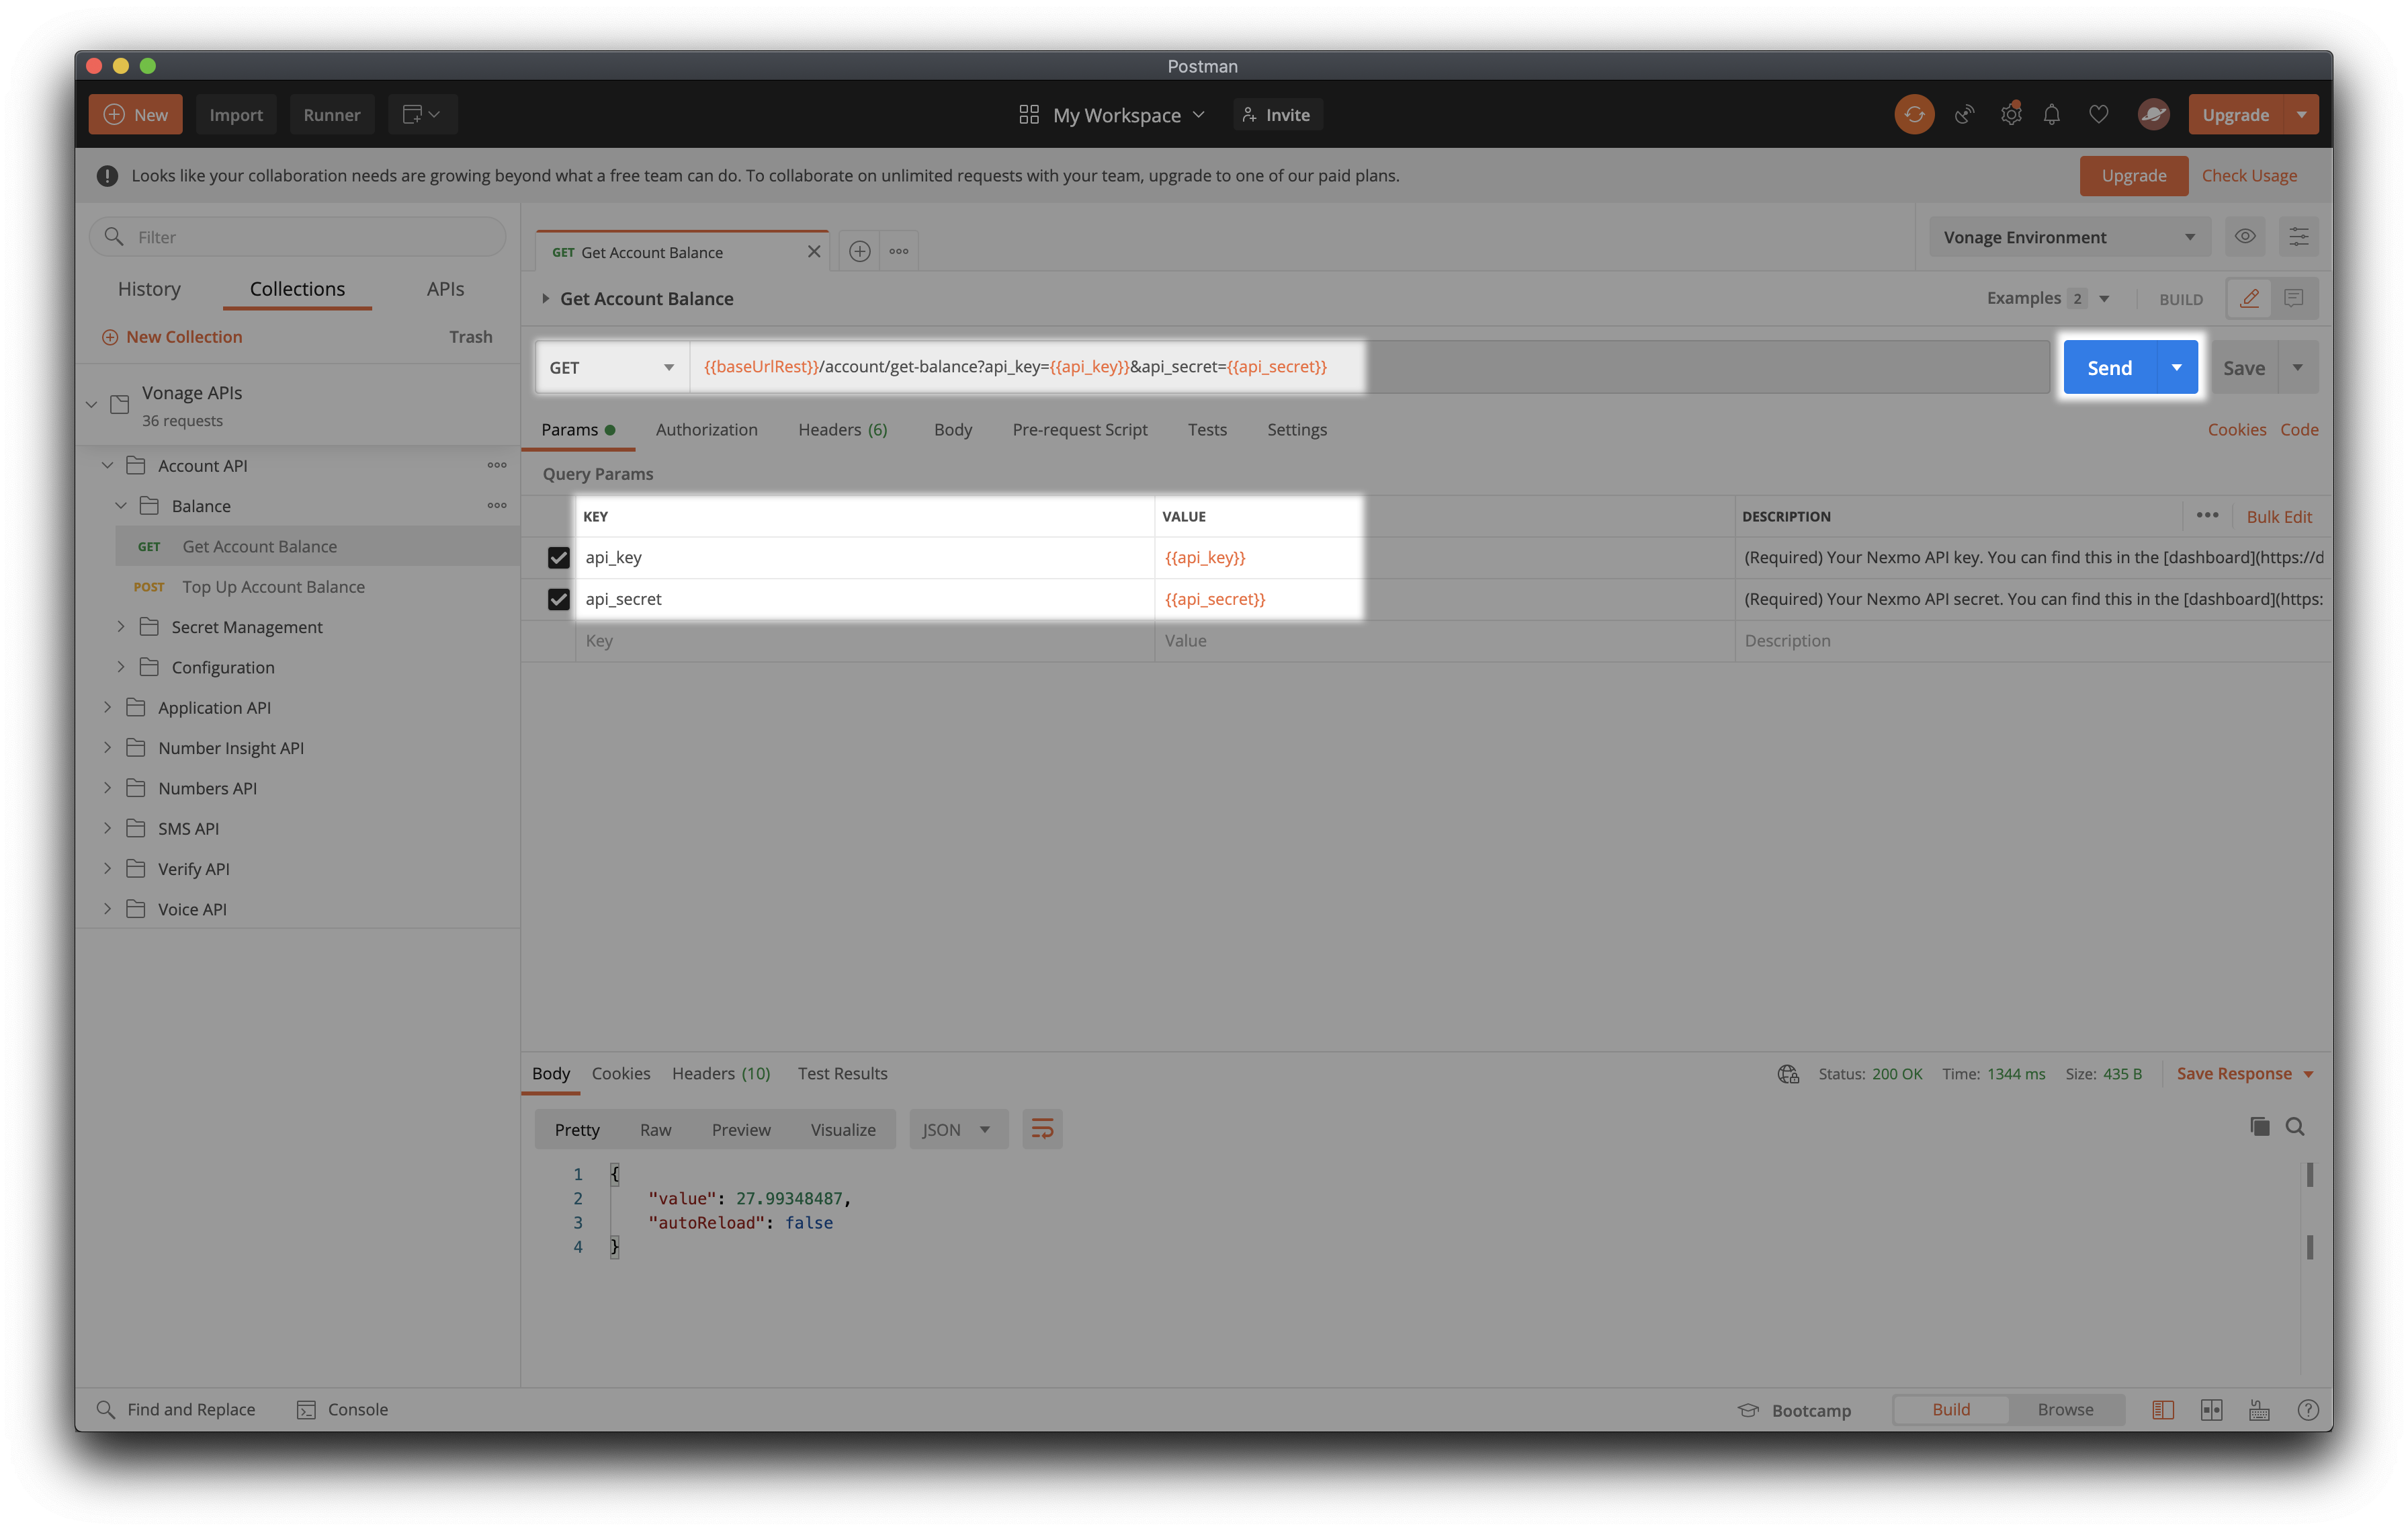
This way, making a simple request like checking your account balance with the Account API becomes a one-click job.
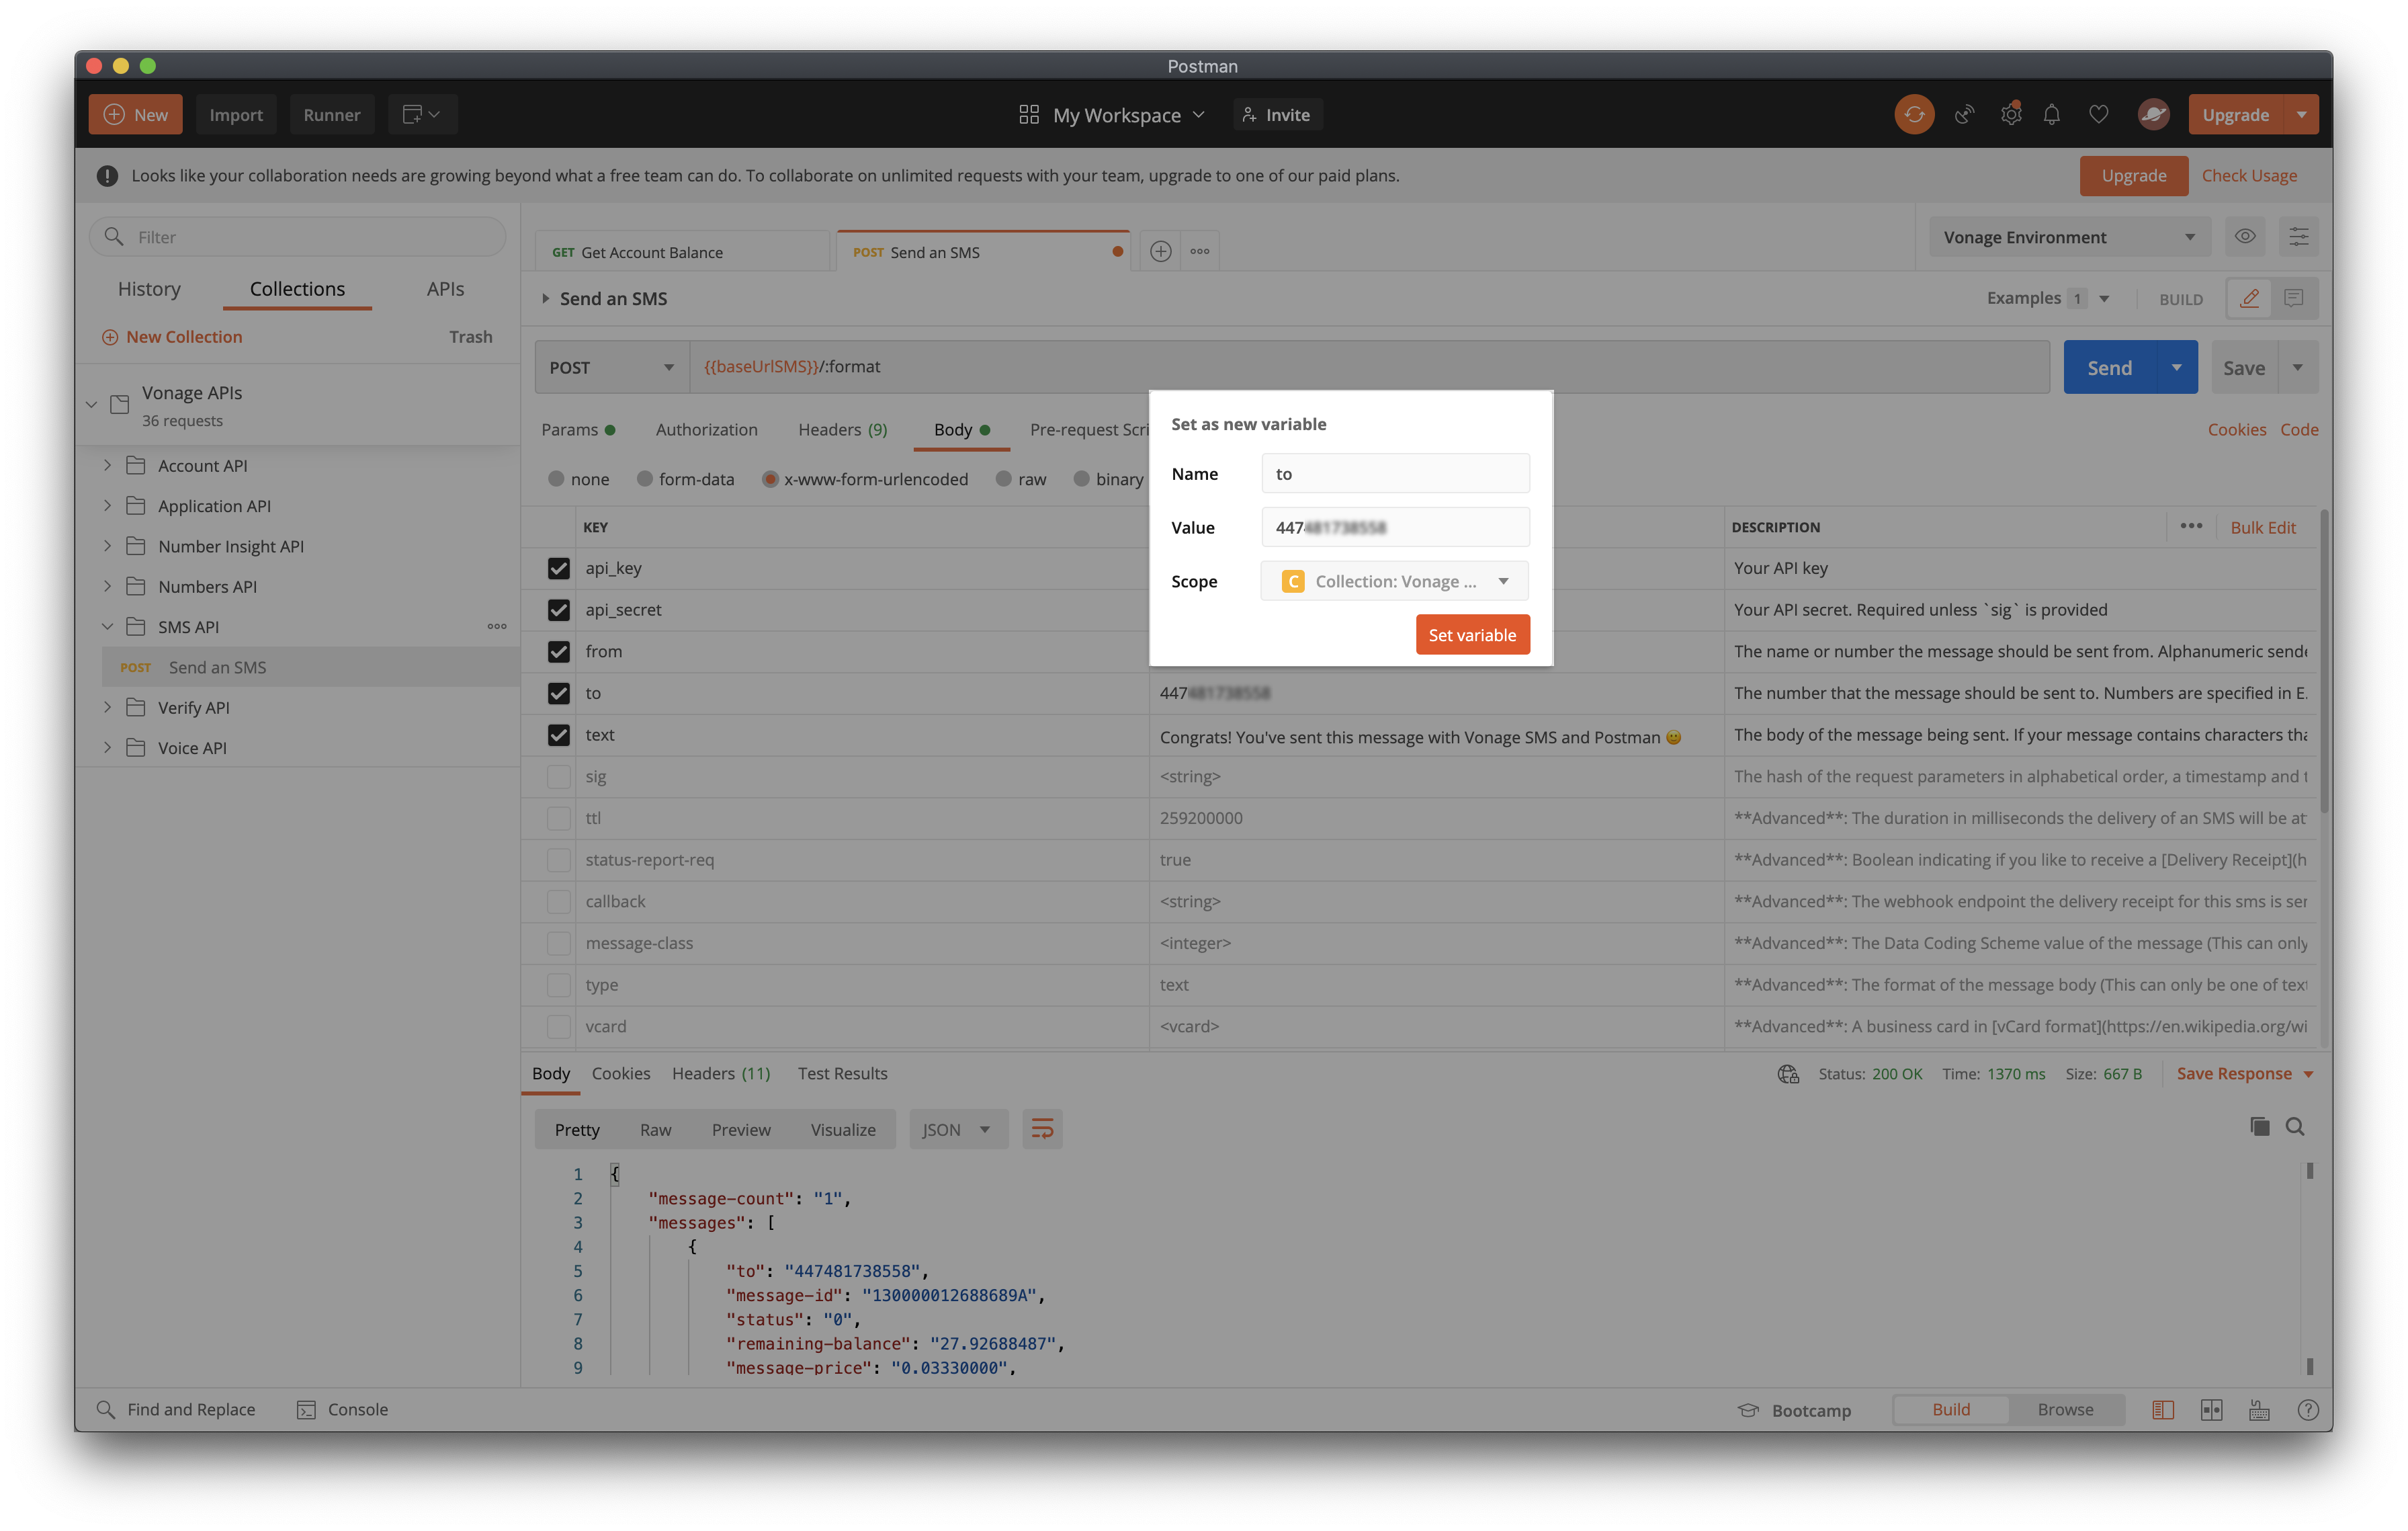
Some other requests may need additional parameters. For example, to Send an SMS, you’d need to fill in to, from and text in the request body, but api_key and api_secret would still be auto-populated.
You may also choose to add any of these parameters as variables, like the to number has been saved as a collection variable in the request featured below.
You can achieve this by either editing your collection or environment directly, or by selecting the hardcoded value you’d like to replace with a variable, and clicking Set as variable > Set as a new variable.
Chaining Requests
Variables in Postman are great, but they aren’t a universal tool for fixing every cumbersome thing.
For example, when using one of the Vonage APIs that authenticates using JWTs, you’ll need to generate that JWT before making your request. To generate the JWT, you’ll need an application ID and a private key, both of which you’ll get once you create a Vonage Application. That amounts to three separate requests one would have to make, which can confuse someone exploring the API for the first time.
Fortunately, there’s a workaround for multi-step prerequisites as well: chaining requests.
Postman offers two scripting areas, Pre-Request Script and Tests, where you can write any JavaScript code you’d like-yes, including making another HTTP request as well.
The Pre-Request Script
The Vonage Voice API authenticates using JSON Web Tokens (JWTs), so to send a Create an outbound call request, we’d first need to:
1. Create a Vonage Application using the Applications API
2. Grab the application_id and private_key values from the response object and use them to generate a JWT.
|
1 2 3 4 5 6 7 8 9 10 11 12 13 14 15 16 17 18 19 20 21 22 23 24 25 26 27 28 29 30 31 32 33 34 35 36 37 38 39 40 41 42 43 44 45 46 47 |
// Check if we already have a JSON Web Token, continue if not if (!pm.environment.has("JWT")) { var btoa = require('btoa') let base64keyandsecret = btoa(`${pm.environment.get("api_key")}:${pm.environment.get("api_secret")}`) // (1) Create a Voice Application by making a request to the Vonage Applications API pm.sendRequest({ url: 'https://api.nexmo.com/v2/applications', method: 'POST', header: [`Authorization:Basic ${base64keyandsecret}`, "Content-Type: application/json"], body: JSON.stringify({ "name": "Demo Postman Application", "capabilities": { "voice": { "webhooks": { "answer_url": { "address": "https://example.com/webhooks/answer", "http_method": "POST" }, "event_url": { "address": "https://example.com/webhooks/event", "http_method": "POST" } } } } }) }, (err, res) => { // (2) Generate JWT using the application ID as a claim and sign it with the private key pm.sendRequest({ url: 'https://jwtapi-dev.netlify.app/.netlify/functions/generate', method: 'POST', header: ["Content-Type: application/json"], body: JSON.stringify({ algorithm: "RS256", private_key: res.json().keys.private_key, claims: { application_id: res.json().id, exp: parseInt((Date.now() / 1000) + 3600, 10) } }) }, (err, res) => { pm.environment.set("JWT", res.json().signed_jwt) }) }) } |
Tests: Why Not Post-Request Script?
Postman allows you to add tests to individual requests, folders and collections. While these tests are immensely useful in ensuring that your API is behaving as expected and for debugging purposes, here’s a kicker: Tests are JavaScript scripts that get executed after a request has been made.
This means that the way we used the Pre-Request Script, we could make the most of the Test area too.
In our voice call example, on successful completion, I am saving the voice_call_uuid as a collection variable using the pm.collectionVariables.set() function. This variable will come in handy should I decide to make other requests involving the Voice API. Alternatively, on failure, I am clearing the JWT value using the pm.environment.unset("JWT") expression so that I can send my request again and generate a new JWT.
|
1 2 3 4 5 6 |
if (pm.response.code == "201") { pm.collectionVariables.set("voice_call_uuid", pm.response.json().uuid); } else { pm.environment.unset("JWT") } |
Read more about defining variables in scripts in the Postman docs.
The Request Body
Finally, let’s put this all together to make a text-to-speech voice call.
You may use the snippet below and provide the to and from as either variables or hardcoded values. Keep in mind that to is the destination number you’re about to call, and from is one of your Vonage numbers. Get one in your dashboard if you haven’t already.
The NCCO is our Call Control Object, which lists all actions to be taken once the call is answered. Check out the NCCO Reference and see what other actions you could include in your call flow.
|
1 2 3 4 5 6 7 8 9 10 11 12 13 14 15 16 17 18 19 |
{ "to": [ { "number": {{to}}, "type": "phone" } ], "from": { "number": {{from}}, "type": "phone" }, "ncco": [ { "action": "talk", "text": "This is a text to speech call from Vonage" } ] } |
This request is now good to go, so push that Send button. Congratulations! And you know what the best part of all this is? If you save your changes and Share Collection, the next person will only have to fill in the missing variable values and press the Send button.
How would you use these handy Postman features? Got any tips and tricks? Let us know; we’re looking forward to seeing what you come up with!